BHW Group Blog
Integrating Salesforce into a node application
Submitted by Taylor Smith on Tuesday, 08/11/15
Salesforce can be a tricky but powerful tool. Using JSForce and some custom triggers you can integrate Salesforce with your custom NodeJS web application for better business management.
Setting Up
There are two sides to this application: the NodeJS application, which in our case will be the customer facing side, and the Salesforce side, which will be used to manage the business relations and tracking. Both of these pieces need a little bit of set up before we get started. In this example we will be using NodeJS snippets with the Koa framework, Handlebars for rendering html, and client side interaction written with ReactJS. We are also using the es6 syntax and are using gulp to compile to es5. In the following section we will set up the node application.
Obviously you have to have a Salesforce license to access the Salesforce platform. Once you have the license you can begin by deciding what objects you want to model. Once you log in to Salesforce the main page, you will use is the "Setup" page. You can get to this from the menu on the top right.

The "Setup" page is where you will spend most of your time developing for Salesforce. Almost all of the functionality for developing can be found across the bar on the left. Sections can be expanded for more options. I will frequently reference the "Setup" page throughout the guide.
One of the first things you will need to do in Salesforce is create the custom objects. This is fairly simple because there is a wizard used to create custom objects. Often these objects will mirror tables in your local database. As a general rule, when you create objects in Salesforce that will be mirrored in your custom application you will need some way to keep them synced. To keep them synced, you need a shared ID of some sort. This can be stored as an external ID in Salesforce. This external ID can be used for update, insert, and even upsert operations. You can also use the external ID's to find relationships between objects.
Some basic routes
The first part we will set up is our customer facing site. This will be built with NodeJS, Handlebars, and React. In our example, we are adding the ability to add a "Widget" on our site and have that information propagated to Salesforce as a custom object. In order to do this, we will create 2 routes. One for the form to add the widget and a second to save the information. When the information is saved, we use the node JSForce library to send the information to Salesforce.
./src/server.js
const koa = require('koa');
const koaBody = require('koa-body');
const logger = require('koa-logger');
const hbs = require('koa-hbs');
const router = require('koa-router');
const React = require('react');
const salesForce = require('./salesforce.js');

const app = koa();
app.use(logger());
app.use(router(app));

app.use(hbs.middleware({
    defaultLayout: 'main',
    viewPath: __dirname + '/../views',
    layoutsPath: __dirname + '/../views/layouts',
    partialsPath: __dirname + '/../views/partials'
}));

const WidgetForm = React.createFactory(require(reactDirectory + '/widget'));

app.get('/edit-widget', function * () {
    yield this.render('widget-form', {
        title: 'Widget',
        widgetForm: React.renderToString(WidgetForm())
    });
});

app.post('/save-widget', koaBody(), function * () {
    const widget = this.request.body;
    //validate widget - if invalid return errors
    //save widget to database, add to "widgetContainer" parent container
    const savedWidget = db.save(widget);
    const widgetContainer = getParent(widget);

    salesForce.addWidget(savedWidget, widgetContainer.id);
});
We use handlebars to handle some of the layouts and script inclusion. This allows for isomorphic rendering with node and react. Below is the main layout with a section where we can include scripts at the page level.
./views/layouts/main.hbs
<!DOCTYPE html>
<html>
    <head>
        <title>{{title}}</title>
        <meta charset="utf-8">
        <meta http-equiv="X-UA-Compatible" content="IE=edge">
        <meta name="viewport" content="width=device-width, initial-scale=1.0, maximum-scale=1.0, user-scalable=no">
    </head>
    <body>
        {{{body}}}
        {{#block "scripts"}}
        {{/block}}
    </body>
</html>
Creating a Form to submit
Now that we have the routes set up and the main layout we can create the form with react. First we create the hbs template for the isomorphic render.
./views/widget-form.hbs
<div class="container">
    <div id="add-widget-form">
        {{{widgetForm}}}
    </div>
</div>

{{#contentFor "scripts"}}
    <script type="text/javascript">
        React.render(React.createElement(Widget), $('#add-widget-form')[0]);
    </script>
{{/contentFor}}
const React = require('react/addons');
const _ = require('lodash');

const Widget = React.createClass({
    getInitialState() {
        return {
            widgetName: '',
            widgetData: '',
            submitting: false,
            errors: {},
            success: false
        };
    },
    handleWidgetNameChange(e) {
        this.setState({widgetName: e.target.value, errors: {}});
    },
    handleWidgetDataChange(e) {
        this.setState({widgetData: e.target.value, errors: {}});
    },
    handleSubmit(e) {
        e.preventDefault();
        this.setState({ submitting: true });
        const data = _.omit(this.state, ['errors', 'submitting', 'success']);
        $.ajax({
           type: 'POST',
           url: '/save-widget',
           data: JSON.stringify(data),
           dataType: 'json',
           contentType: 'application/json; charset=utf-8'
           }).done(() => {
              this.setState({ submitting: false, success: true, errors: {} });
           }).fail(result => {
              this.setState({ submitting: false });
              if (this.isMounted() && result.responseJSON.validationResult) {
                 this.setState({ errors: result.responseJSON.validationResult });
              }
           });
      },
       render() {
          return (
             <div className="widget-form-container">
             {this.state.success ?
                <h3 className='success'>
                   Widget Saved!
                </h3>
             : <h3>
                Add Widget
             </h3>}
             <div className="error-info">
                <ul className={(_.size(this.state.errors) < 1) ? 'hide' : ''}>{_.map(this.state.errors, (v, k) => <li key={k}>{v}</li>)}</ul>
             </div>
             <form className={'widget-form' + (this.state.success ? ' hide' : '')} onSubmit={this.handleSubmit} >
             <div className="input-row">
                <label htmlFor='title_copy'>Widget Name</label>
                <input className={this.state.errors.widgetName ? 'error' : ''} name='widgetName' defaultValue={this.state.widgetName} onChange={this.handleWidgetNameChange} type='text' autofocus />
             </div>
             <div className="input-row">
                <label htmlFor='title_copy'>Widget Data</label>
                <input className={this.state.errors.widgetData ? 'error' : ''} name='widgetData' defaultValue={this.state.widgetData} onChange={this.handleWidgetDataChange} type='text' />
             </div>
             <div className='input-wrap'>
                {this.state.submitting ?
                   <i className="fa fa-spinner fa-spin fa-3x"></i>:
                   <input type='submit' name='Save Widget' value='Save Changes' />
                 }
             </div>
          </form>
        </div>
      );
   }
});

module.exports = Widget;

if (typeof window !== 'undefined') {
   window.Widget = Widget;
}
At this point the application should be functioning with a page to add widgets. This guide doesn't focus on the node side of this as I would like to cover more of the interaction with Salesforce.
Converting to Salesforce Objects
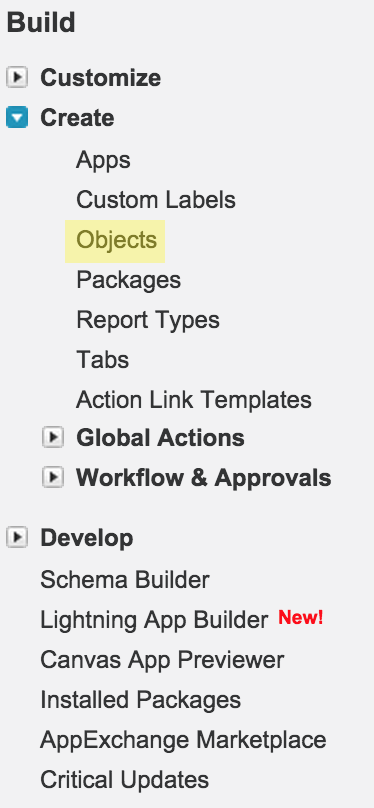
Salesforce uses Objects to do most of the work. Everything from contacts to purchases is modeled by an object. In order to represent our Widgets we will need to create a custom object. To do this go to the "Setup" page and click on the "Create" tab on the left to reveal the link to "Objects".
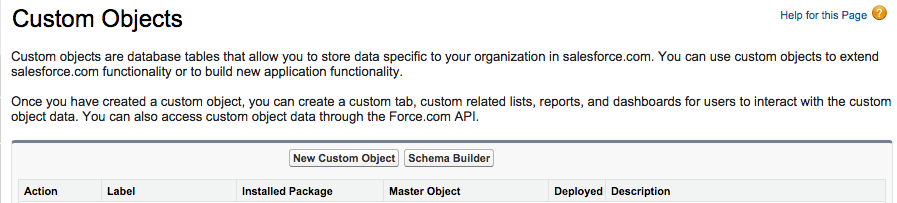
You can then click "New Custom Object".
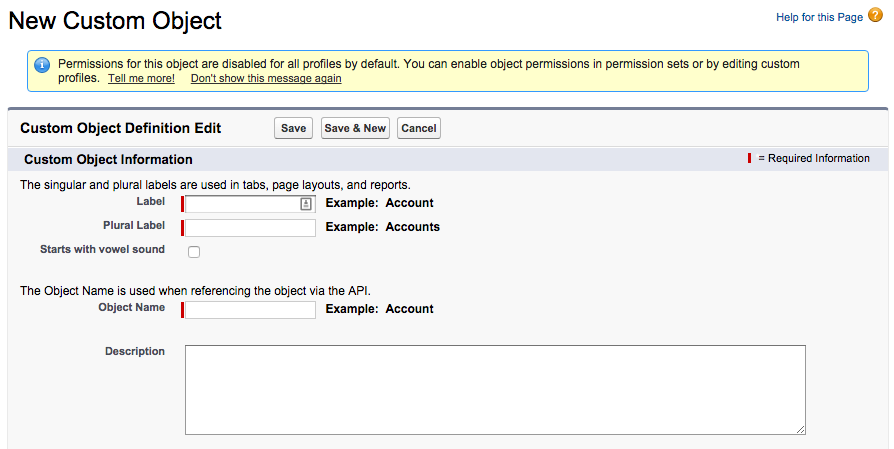
This wizard is simple enough, just be aware of the name that the Salesforce API will be using is generated as a part of this process as the "Object Name" field.
The process of figuring out API information can be a little daunting at first because finding the correct names and the relations between objects can be difficult to understand. JSForce provides a describe query that can help you to find this information. You can also find information by browsing the objects on the Salesforce site. They provide a "Schema Builder" tool (found on the "Objects" page) to view the relations between objects. In our example, we create a Widget object and a parent container for the widgets to demonstrate how to handle relations. So we created a new custom object and gave it a few fields including a name, a custom data field, and a field to tell if it had been sold. To create the relationship, we create a lookup field to the parent object. Lastly, we make sure that the API names are correct so we can use them for the JSForce queries.
JSForce
JSForce allows us to communicate from our node application to the Salesforce platform. Once you enter your account information for the connection, you can begin using their API to access Salesforce. The JSForce API allows us to access the Salesforce SOAP API through a neatly packaged javascript library. The JSForce documentation covers the main operations that will be used including CRUD operations, querying, and search. The describe and identity functions are also helpful for finding information about objects in Salesforce. Once we have the necessary information we can build the interaction from our site to Salesforce.
Sending data to Salesforce
We created a separate module for any queries to Salesforce. Using the upsert, we can call this code for either insert or update of records, if we are given the external ID. For more examples, you can look at the JSForce documentation.
const jsforce = require('jsforce');
const jsConn = new jsforce.Connection();

//From: https://jsforce.github.io/document/#connection
jsConn.login('<salesforce username>', '<salesforce password>');


module.exports= {
   addWidget(widget, widgetParentId){
      const widgetContainer = yield jsConn.sobject('pba__WidgetContainer__c').select('*').where({External_ID__c: widgetParentId});
      const widgetSF = {
         Name: widget.name,
         Custom_Field__c: widget.custom_data,
         External_ID__c: widget.id,
         Widget_Container__c: widgetContainer.Id
      };
      return yield jsConn.sobject('pba__Widget__c').upsert(widgetSF, 'External_ID__c');
   }
};
Getting Results Back from Salesforce
The result that you get back from Salesforce can be used for error checking and for getting more information. You can request other information like the Salesforce ID. The errors that are returned are helpful in diagnosing problems with queries, variable naming, or even with types of data.
How Does Salesforce Communicate Out?
One way to send messages and data out is to use triggers. Triggers respond to changes on Salesforce Objects and can be used to call Apex code. Apex code in turn can then send outbound http requests. Apex provides this functionality through the HttpRequest class.
Dev Sandbox and Deploys
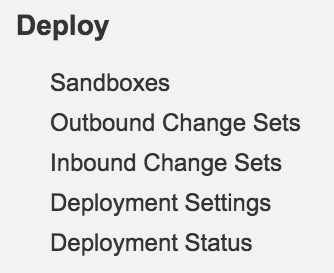
In order to develop any Apex code you must first create a development sandbox. This can be found by going to the "Setup" page and then to the "Sandboxes" Page.
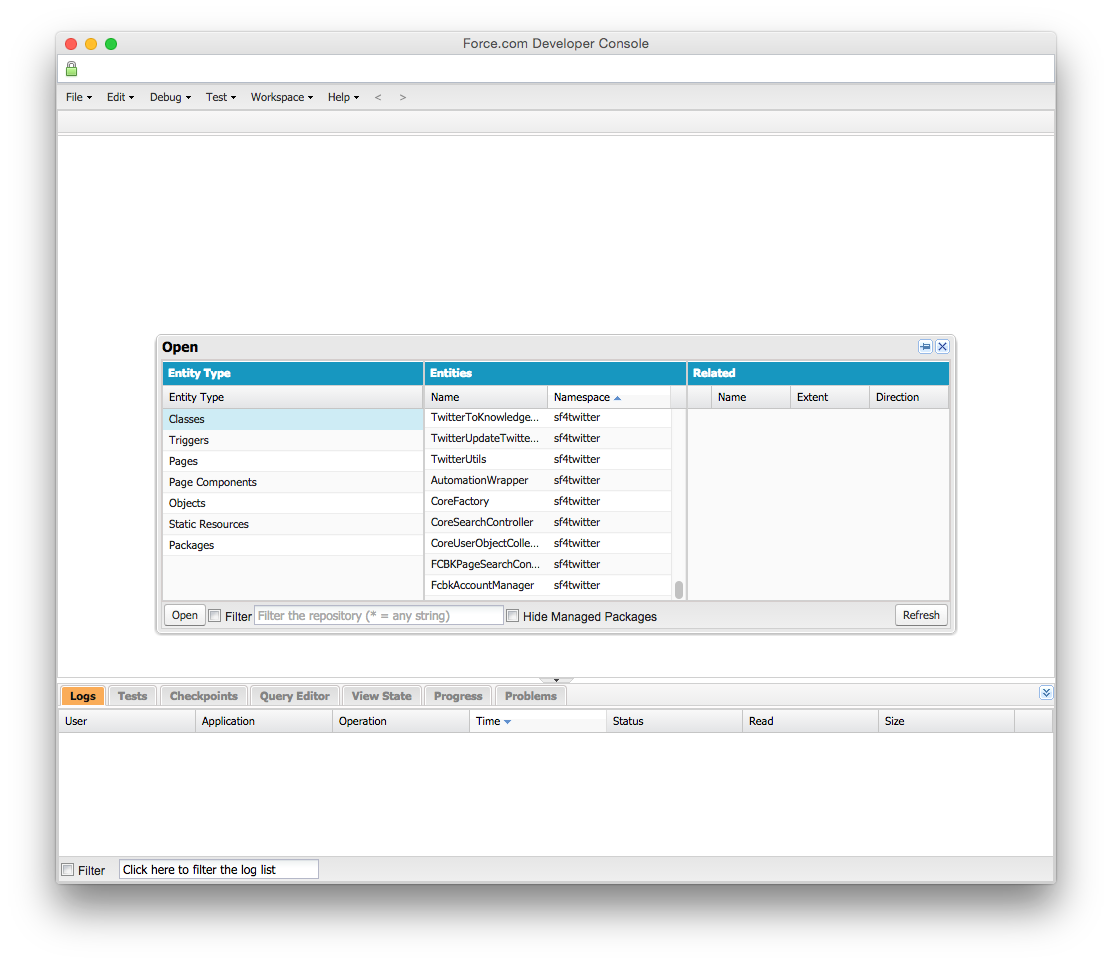
Any code that you develop as an Apex class or trigger is created here. Salesforce provides a useful developers console that features syntax highlighting, autocompletion, and predictive suggestions. These can be very helpful when developing with Apex Libraries.
The process for deploying from the sandbox can be a little confusing though. Once you have finished your code, sufficiently tested it, and are ready to deploy, you can follow these steps:
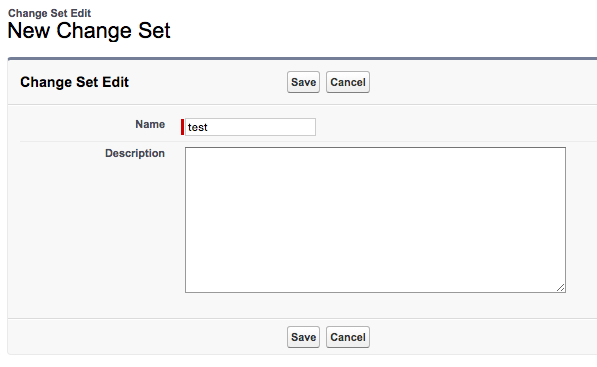
1.Create an outbound change set by going to the "Setup" page and clicking "Outbound Change Sets" under the "Deploy" section on the left.

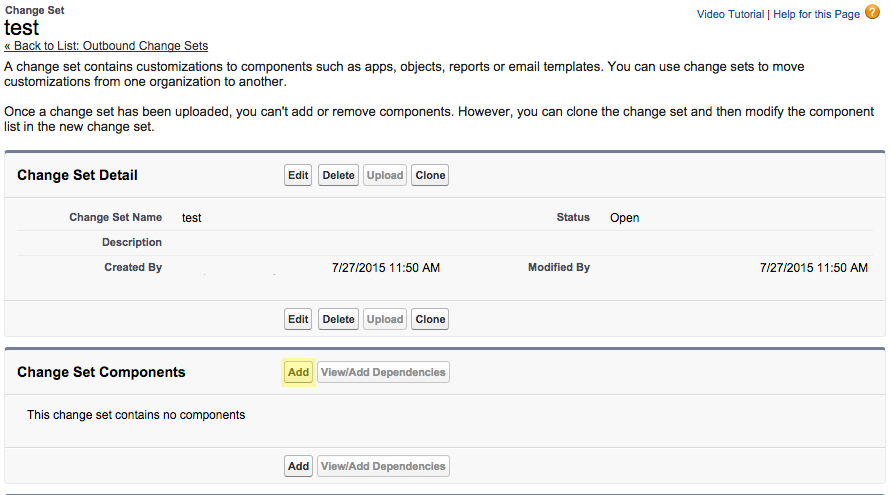
2.Add components to the change set. You can also check the option to add any dependencies. This will include any Objects, Classes, or other related code that is used in the element that you are adding. This can be useful to ensure that any custom fields or objects used to create the trigger will be included in the change set.
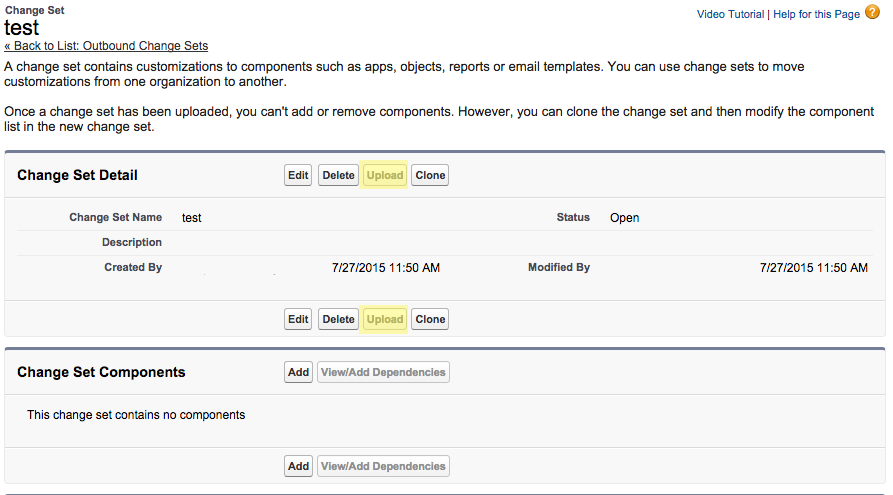
3.Once all of the elements are added, click "Upload" to finish the development side of the deploy.
4.Switch back to the production site and go to the "Setup" page. 5.On the "Setup" page in the "Deploy" section select "Inbound Change Sets".

6.At this point you should see the change set in the "Change Sets Awaiting Deployment" section. There is a link to deploy the change set that you should click to finish the process.
If your code did not contain tests, the deploy will fail and alert you to the required coverage for test cases. If your code has tests, is valid, and the deploy succeeds, it will eventually show up in the "Deployed Change Sets" Section and will be currently active. The changes can take up to 30 minutes to propagate after this process, so testing is essential for saving time and effort. Also, you can save a lot of time during the deploy if you use the developer console to catch errors and run tests before the deploy.
Preparing for a Trigger
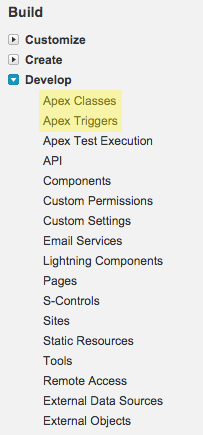
Creating the trigger is fairly straightforward. Salesforce documentation can be lacking, but there are plenty of examples online. For our purposes, we need the trigger to make calls out. Unfortunately this is not allowed directly from the trigger. In order to make calls out, you have to create a separate class to send http requests. You can get to triggers and classes on the "Setup" page by expanding the "Develop" tab under the "Build" section.
public class WidgetOutbound {
   @future (callout=true)
   public static void widgetSold(Integer widgetId, Integer widgetContainerId) {
      HttpRequest req = new HttpRequest();
      HttpResponse res = new HttpResponse();
      Http http = new Http();
      req.setEndpoint('https://oursite.com/widget-sold');
      req.setMethod('POST');
      req.setHeader('Content-type','application/json');
      Map<String, Integer> mapBody = new Map<String, Integer>();
      mapBody.put('widget_id', widgetId);
      mapBody.put('widget_container_id', widgetContainerId);
      String jsonString = JSON.serialize(mapBody);
      req.setBody(jsonString);
      try {
         res = http.send(req);
      } catch(System.CalloutException e) {
         System.debug('Callout Error: ' + e);
         System.debug(res.toString());
      }
   }
}
Creating the trigger
Now that we have the outbound class, we can create the trigger that calls it. Keep in mind that triggers can fire on many different events and are not limited to "before update".
trigger update_widget on pba__Widget__c (before update) {
   for(pba__Widget__c newWidget : Trigger.new ) {
      pba__Widget__c oldWidget = Trigger.oldMap.get(newWidget.Id);
      Boolean widgetSoldStatusChanged = !(oldWidget.Widget_Sold__c == newWidget.Widget_Sold__c);
      if(widgetSoldStatusChanged && newWidget.Widget_Sold__c) {
         System.debug('Widget Trigger: Widget Sold!');
         WidgetOutbound.widgetSold(newWidget.external_ID__c.intValue(), newWidget.RR_Postgres_Account_Id__c.intValue());
      }
   }
}
Writing Tests
Salesforce requires that any classes and triggers that you write include test cases. These tests are run before deploying from the sandbox to the production site. Some examples of tests follow:
@isTest
public class TestWidgetOutbound {
   public static testMethod void testWidgetSold() {
      Test.setMock(HttpCalloutMock.class, new WidgetWebServiceCalloutMock());
      WidgetOutbound.widgetSold(1,1);
   }

   public static testMethod void testWidgetUpdateTrigger(){
      Test.setMock(HttpCalloutMock.class, new WidgetWebServiceCalloutMock());
      pba__Widget__c testWidget = new pba__Widget__c( Name = 'Apex Test Widget', Custom_Field__c: 'test data', External_ID__c: 1, Widget_Sold__c: 'No');
      insert testWidget;
      pba__Widget__c testWidget2 = [SELECT Id FROM pba__Widget__c WHERE Name = 'Apex Test Listing' LIMIT 1];
      testListing2.Widget_Sold__c = 'Sold';
      update testListing2;
      delete testListing2;
   }
}

@isTest
global class WidgetWebServiceCalloutMock implements HttpCalloutMock {
   global HTTPResponse respond(HTTPRequest req) {
      // Create a fake response,
      // Set response values, and
      // return response.
      HttpResponse res = new HttpResponse();
      res.setHeader('Content-Type', 'application/json');
      res.setBody('{"foo":"bar"}');
      res.setStatusCode(200);
      return res;
   }
}
Responding to the Trigger
Handling the responses is easy because they can be handled like any other asynchronous request. With koaBody we can parse the results and store the information accordingly. This can be used to update the database, send emails, or change the business workflow. The basic code follows this structure:
app.post('/salesforce/widgetTrigger', koaBody(), function * () {
   const details = this.request.body;
   //handle details about widget
   this.status = 200;
});
Gotchas and other notes
There are a couple things to watch out for when using Salesforce. At times, the Salesforce API can be really slow. Average request times can be up to 3 seconds for simple operations. Below are some other issues that can be addressed if they come up.
Whitelisting Outbound Traffic
A big gotcha of Salesforce is that outbound traffic must be whitelisted. This means that we need to whitelist our site by url so that Salesforce doesn't reject all of our outbound requests. This can be found on the "Setup" page under Administer. Expand the "Security Controls" section and click "Remote Site Settings". There is a wizard to add a "New Remote Site" from this page that will approve any site that you want to send messages to.
Catching Errors with Logs
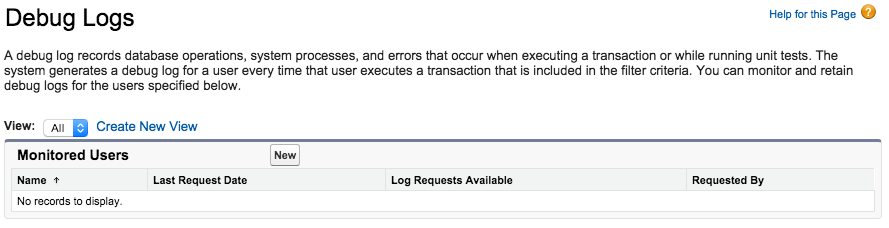
A good way of ensuring that your application is working properly is by using logs. One trick we found helpful was to have the website login through JSForce/Salesforce as a unique user. That way we could track any changes made by the site. It also allows debug logs to be tracked by user. On the "Setup" page near the bottom on the left is a section for "Monitoring".

If you expand the "Logs" section, you can find the "Debug Logs". By clicking on this, you can see that Salesforce generates many logs even through normal operation.

You can limit what you see and filter it to specific users which will let you see specific errors or problems. This can be useful to figure out where a trigger is failing or what information the trigger is seeing on the fire event.
Conclusion
Hopefully at this point you have a working application that communicates with Salesforce. This can be a tricky process and hopefully I have provided enough resources for you to get this working. Unfortunately, the documentation for Salesforce can be a bit lacking at times, and because of the recent move to "Force.com", many articles are no longer hosted at the same urls.
Other libraries
- Font Awesome - spinners and other small graphics
- Koa Router - handle gets and posts
- koaBody - parse http body as a koa middleware